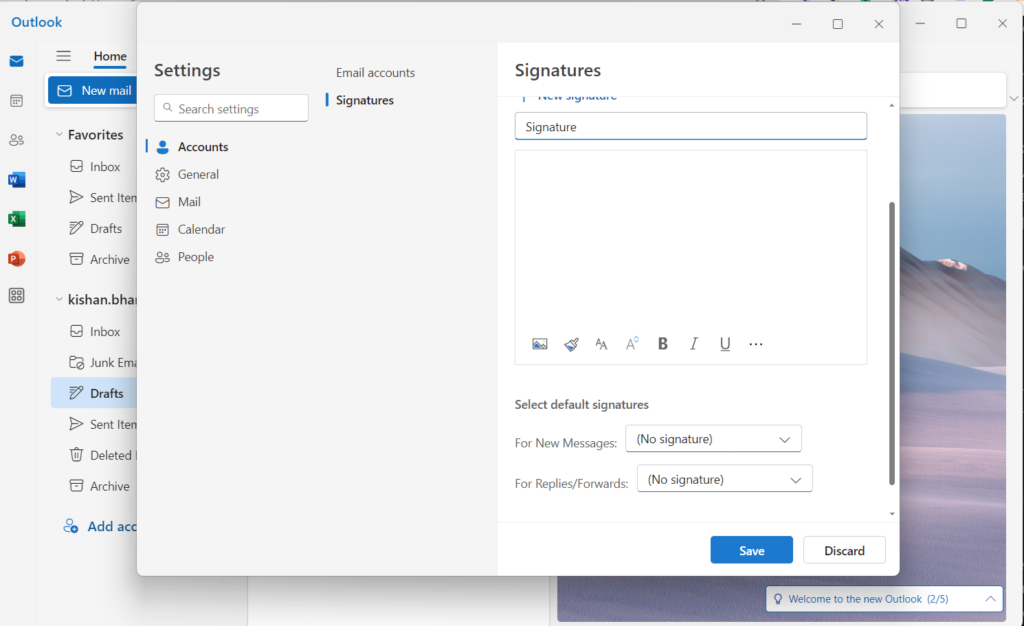
A polished email signature elevates your messages. It conveys professionalism by showcasing your contact info and branding subtly, leaving a lasting positive impression. Let’s follow step-by-step instructions to add Signature in Email.

In today’s digital age, email remains a cornerstone of professional communication.
A well-crafted email signature can elevate your messages, leaving a lasting and positive impression on recipients.
This guide will delve into the process of adding an email signature in Outlook, providing step-by-step instructions for both the desktop application and Outlook web version.
Beyond simply displaying your name, an email signature offers a range of benefits:
Before diving into the technical aspects, consider the content of your signature. Here are some key elements to include:
Keep it concise and avoid excessive graphics that might not display correctly on all devices.
Step 1: Open Outlook Options:
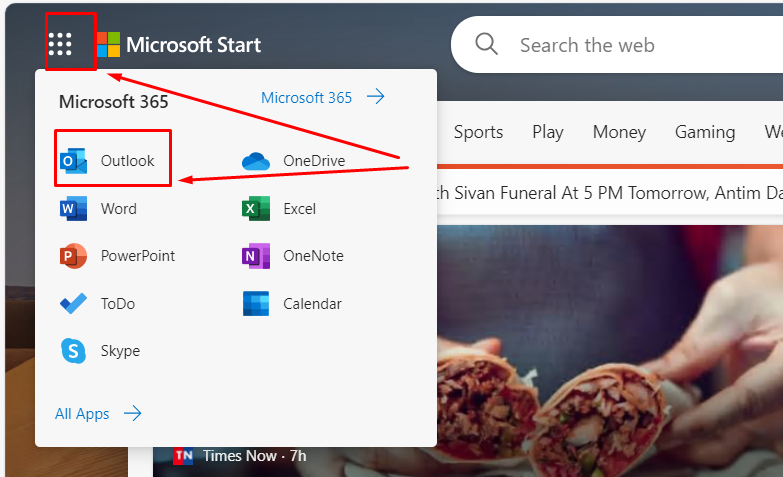
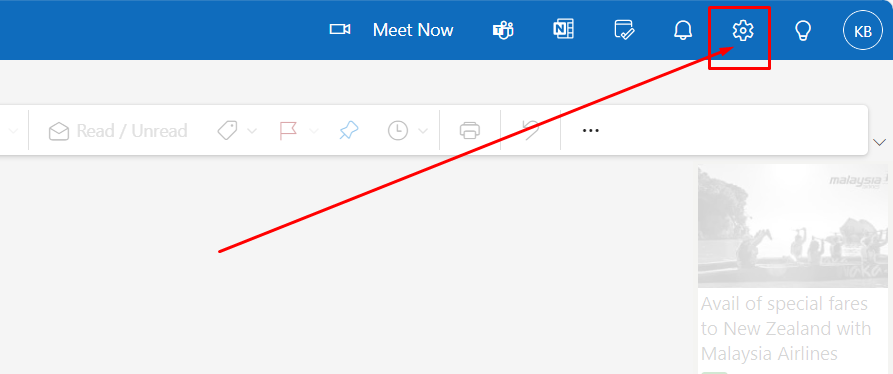
Step: 2 Select Setting:
Step 3: Click on Compose and Reply:
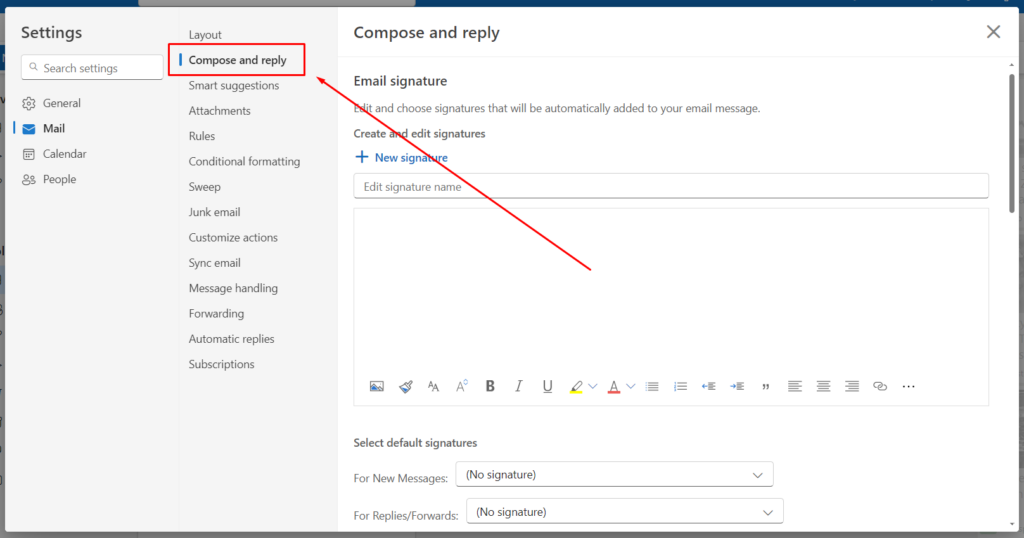
Step 4: Create a New Signature:
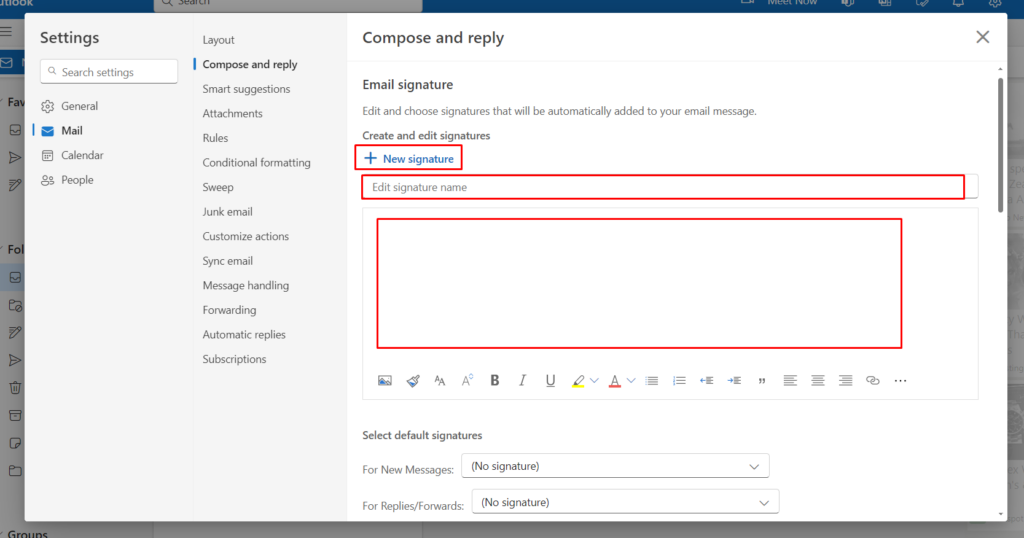
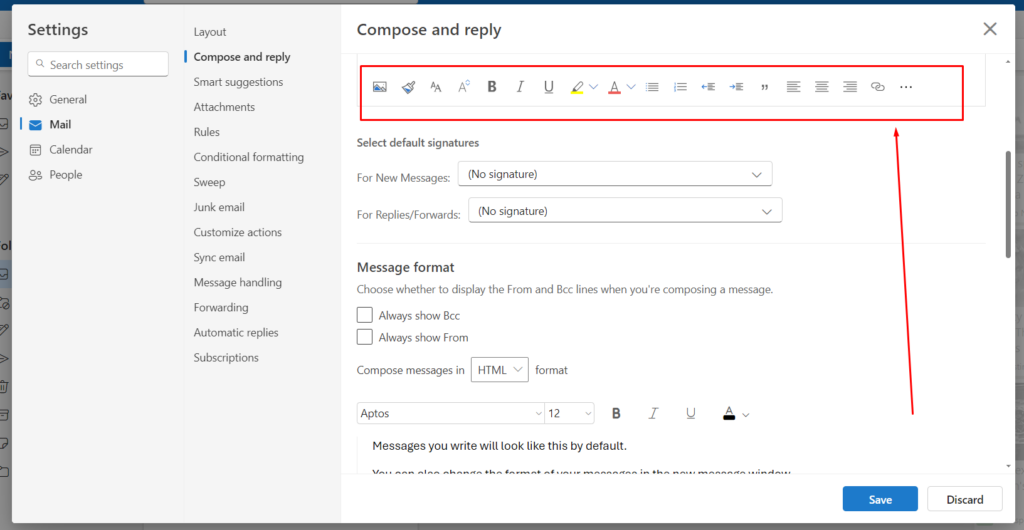
Step 5: Customize Your Signature:
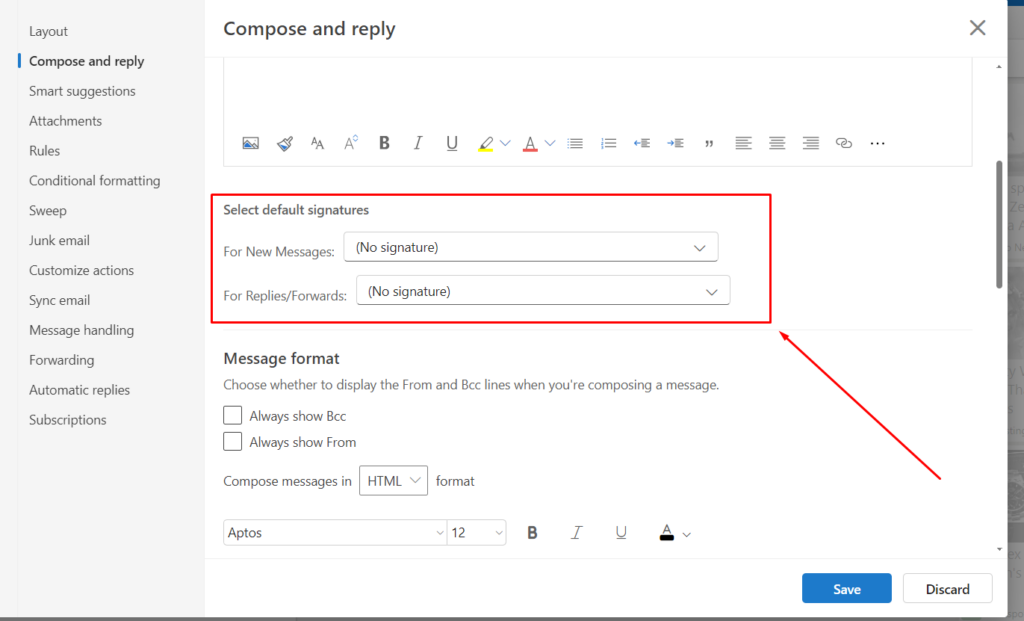
Step 6: Set Default Signatures:
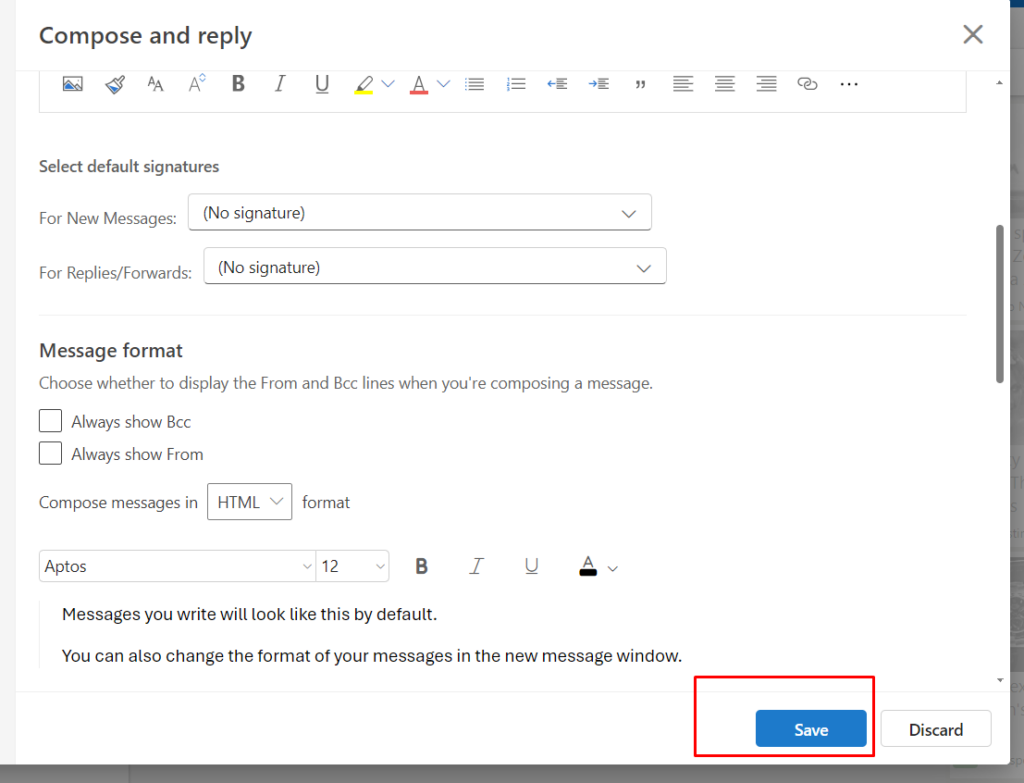
Step 7: Save and Close:
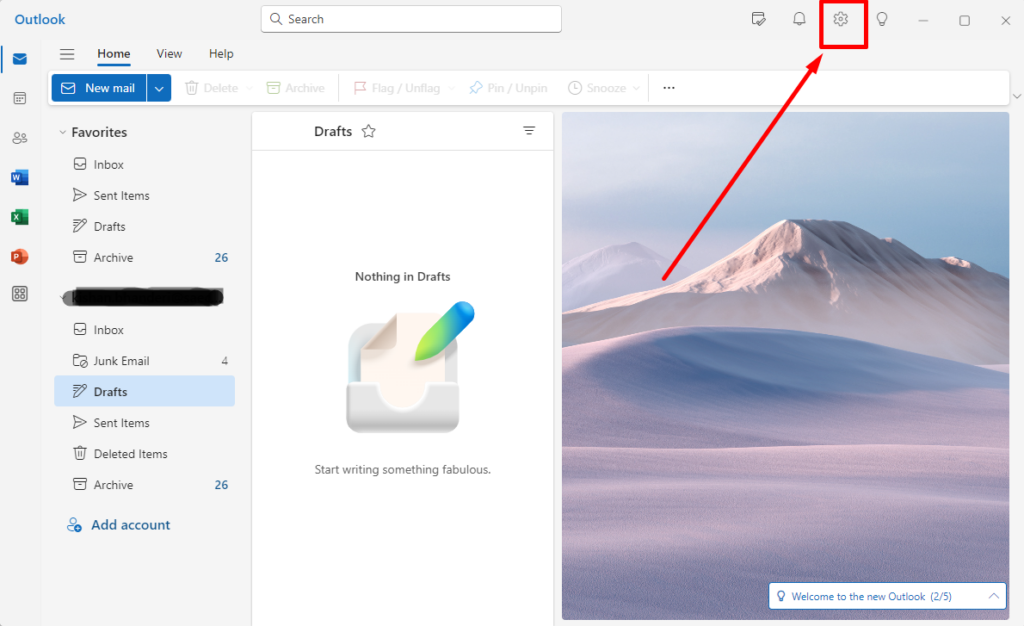
Step 1:Access Settings: Click the gear icon in the top right corner of your mailbox.
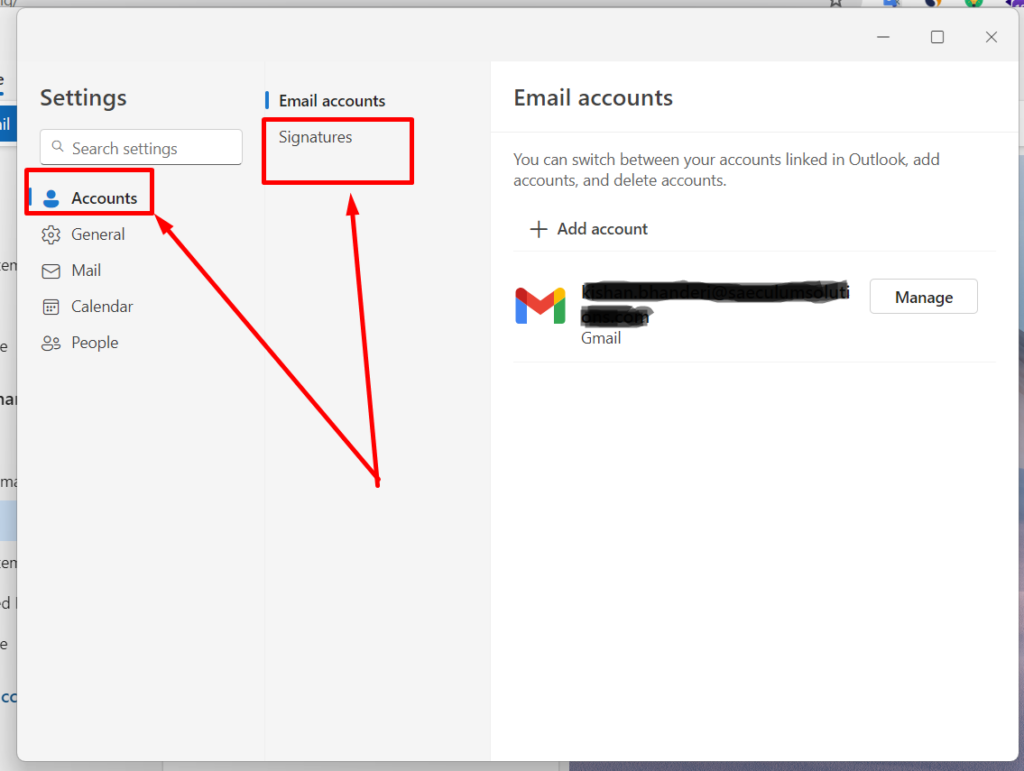
Step 2: In the “Account” section, select the “Signature” option.
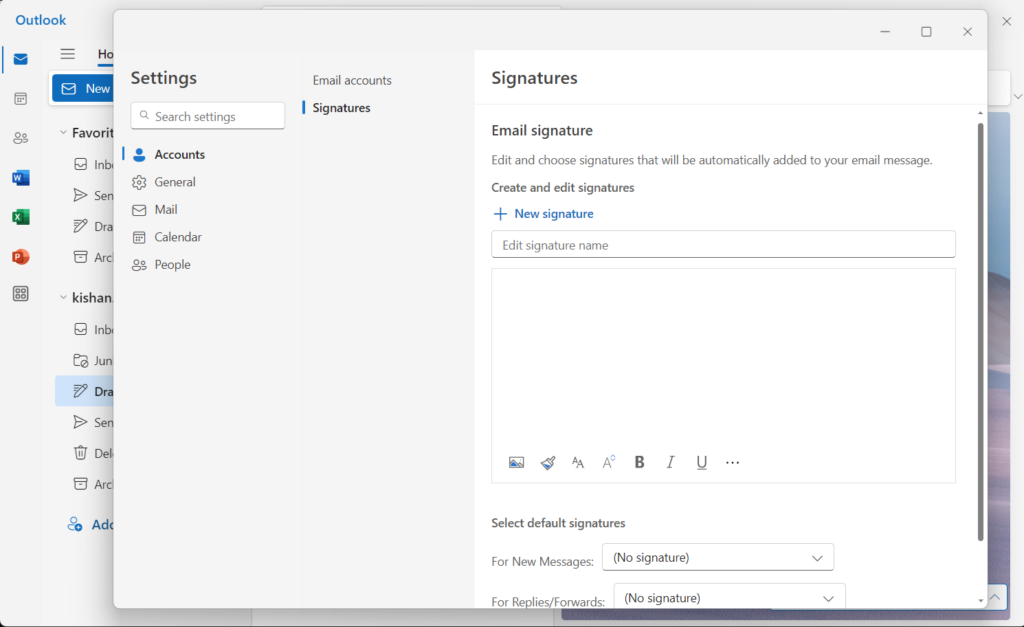
Step 3: Now You can add a Signature as per your choice. If you want to add a Signature image then upload by Image upload option [🖼️]. or If you want to add an HTML signature then paste the HTML code in the text box.
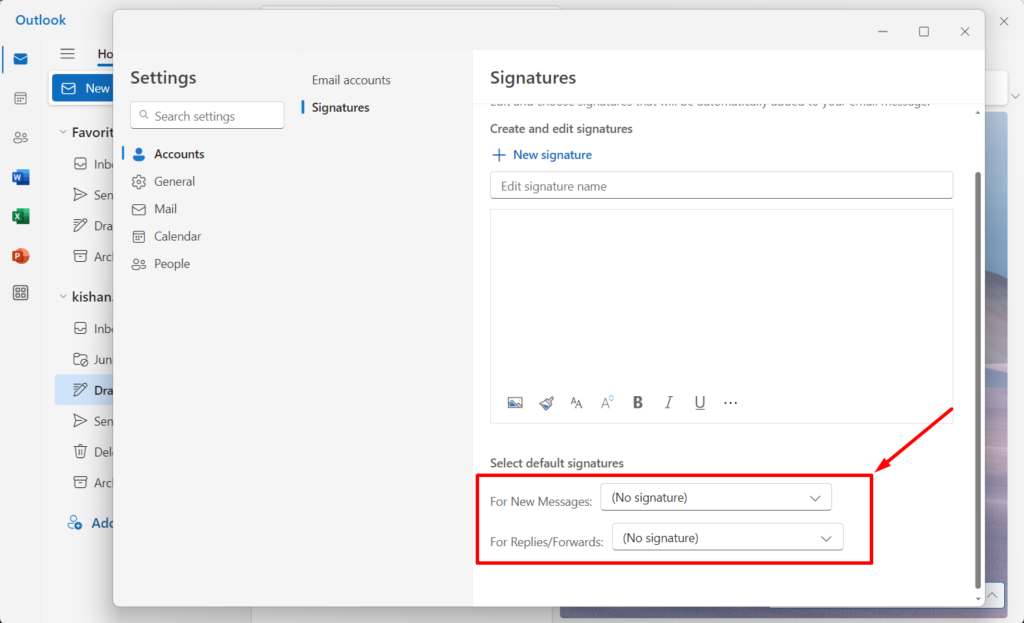
Step 4: Set Default Signatures:
Step 5: Save and Close:
